
Photo Recovery Steps
Recovering your lost/deleted photos, audios and videos from formatted memory card or any storage device is very simple with ADI Software’s Photo Recovery Tool.
Follow the below mentioned steps to recover your lost/deleted photos, audios and videos.
Step 1:
Download and install ADI Software’s Photo Recovery Tool on fixed drive.
Note: Please do not install or copy or download Photo Recovery software to the drive or partition from which photos needs to be recovered. This would permanently overwrite the files beyond recovery.
Step 2:
Connect the storage device (from which data needs to be recovered) to the computer where Photo Recovery Software is installed. Please ensure that the storage device is detected by your computer.
Step 3:
Launch Photo Recovery software either from desktop shortcut or Program folder. The Software Main screen appears as shown in Screenshot 1.
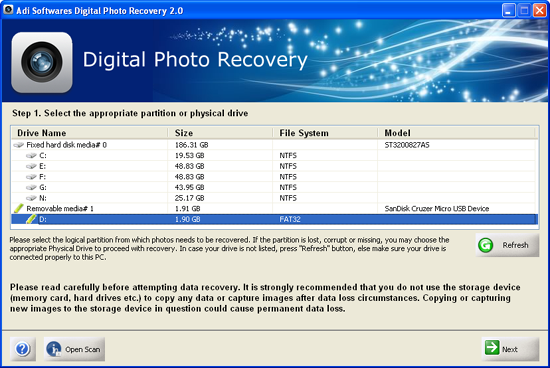
Screenshot 1: Photo Recovery Software’s Main Window
Step 4:
Locally connected drives are displayed in the software. Select the drive from which, photos needs to be recovered and click on “Next” button.
Step 5:
As soon as you click on “Next” button, various photo file types that could be recovered are listed. Select the file types of photos to be recovered and click on “Scan” button as shown in Screenshot 2.
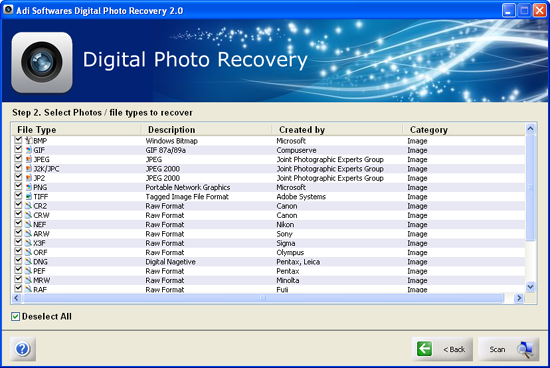
Screenshot 2: Select file types to be recovered
As soon as you click on “Scan” button, Photo Recovery software starts the scanning process.
Step 6:
Recovered photos are displayed in a well organized data tree, sorted with respect to file types as shown in Screenshot 3.
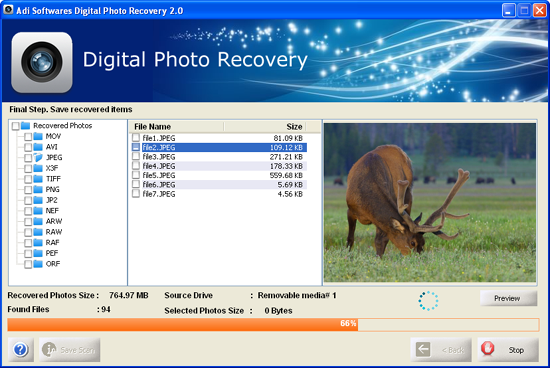
Screenshot 3: Recovered photos
You may click on the recovered photo to preview, which gives you a fair idea of recovery possibilities and helps to evaluate the demo version.
Step 7:
Save the recovered data to a safe location by checking the photos you wish to save and click on “Save” button. You may select the “Recovered Files” folder to save all the recovered photos.
Points to remember:
“Save” option is not enabled in demo version of ADI Software’s Photo Recovery Tool. In order to save the recovered photos, you need to purchase the software.
Do not save the recovered photos to the same drive from which, its being recovered. This would permanently overwrite the photos beyond recovery.
You may save the scan info if you are trying the demo version of Photo Recovery software by clicking on “Save Scan” button. Later, you may load the recovered data tree, which avoids rescanning the drive.
Frequently Asked Questions:
| » Recover deleted photos from Camera… | |||||||||||||||||||||||||||||||||||||||||||||||||||||||||||||||||||||||||||||||||||||||||||||||||||
| » Recover lost photos from a formatted SD card… | |||||||||||||||||||||||||||||||||||||||||||||||||||||||||||||||||||||||||||||||||||||||||||||||||||
| » More FAQ… |
Home – Free Download – Buy – Support – Links – FAQ – Features – Screenshots – System Requirements – How to use
Photo Recovery Software |Deleted Photos Recovery Software| Picture Recovery Software | Recover Deleted Photos | Image Recovery Software